Sidechain Compression happens when the volume of one instrument triggers a compressor to lower the volume of another instrument. Most often used with Kicks, producers use this effect to achieve a slight volume pumping effect we all know and love. Aside from getting your club bangers to swell, you can use sidechaining effects for all sorts of creative endeavors. Some things to try could include:4
- Bass + Kick ducking
- Carving out room for Vocals
- Snare ducking
- Reverb ducking
Let’s take a look at Ableton’s stock Compressor and what you’ll want to reach for first when trying to achieve a sidechain effect.

To access the Sidechain Menu, click this arrow. You’ll see two columns - Sidechain and EQ. You’ll want to set your incoming audio input in the Sidechain column to match the instrument you want to be controlling the sidechain.

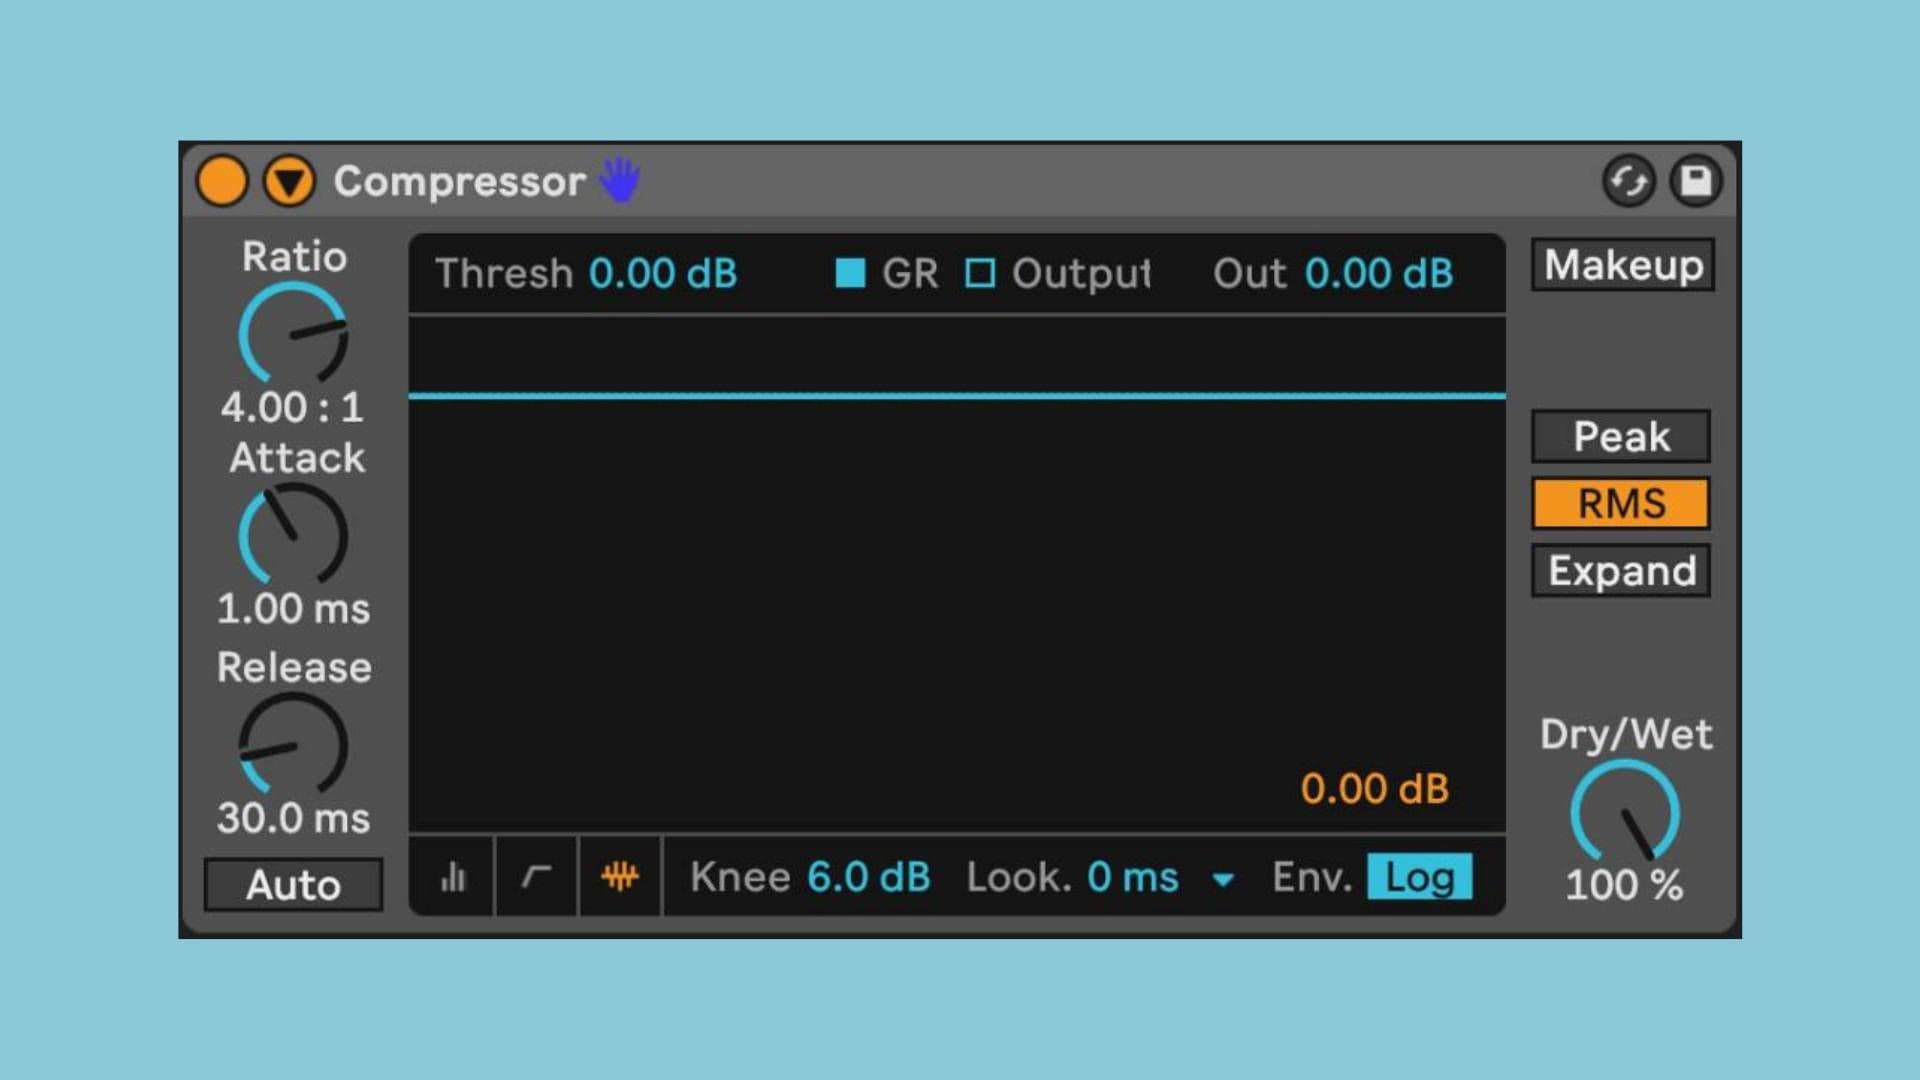
I find this view of the compressor most useful for sidechaining because you can visually see the incoming signal of your Compressor Input.

The light blue line you see here is the “Threshold”. Basically it’s the saying “anything past me gets turned down”. Go ahead and reach for Threshold first and bring it low enough for you to hear the sidechain compressor working on your audio.

Let’s take a look at the shape of this kick right now. It’s got a lot of body so it actually keeps the compressor down for longer than I want it. We can refine the incoming signal a little more instead of spending a chunk of time tweaking the Threshold, Attack, and Release

Let’s move to the EQ column in the Audio Effect. We can tell the compressor to listen to more precise frequencies of the incoming signal. The secret to getting a cleaner “kick” input for your sidechain is to set the highpass frequency high enough to catch the rhythmic “top” end of the kick instead of the “boom”. If you want to go one step further, you can click on the headphones within the audio effect to isolate the sound your compressor is listening to (just remember to turn off the headphones after)! Now if you take a look at the incoming frequencies in the compressor, the Kick should read sharper.

Now you can feel free to adjust the Threshold, Attack, and Release to taste, knowing you’ve done your part to hone in on the incoming signal! If you’re wanting rhythmically precise subdivisions, use this beat division calculator to calculate the exact Release subdivision.